National parks are great places for shooting nature. Even if one keeps going back to the nearest most accessible national park, there are hundreds of photos that can be produced from the same place. The photographer just has to know how to apply different perspectives with the same scenery.
Parks will always draw photographers, and it is best to avoid the cliché by simply shooting at stunning objects as they meet the eye. Find a creative angle at shooting. For example, look for repetitive or symmetrical patterns among lines of trees, flowerbeds, or even street lamps.

Another technique for composition is to find contrasting colors. A lone parked red bike with dozens of trees with dark green foliage behind it is an example of great color contrast. In winter, black and white photography looks great on nature as dark subjects interrupt the white in the vastness of snow.

The key technique is to select only a few subjects that give an interesting story, instead of shooting at the wealth of things that can be photographed at the park and end up having repetitive and ordinary pictures anyone else could take.
Hi, I'm Keith W. Springer from New York. Although I've retired as an event photographer, I've never given up my passion and I continue to develop my craft in the outdoors. Connect with me on Facebook here.
Parks will always draw photographers, and it is best to avoid the cliché by simply shooting at stunning objects as they meet the eye. Find a creative angle at shooting. For example, look for repetitive or symmetrical patterns among lines of trees, flowerbeds, or even street lamps.
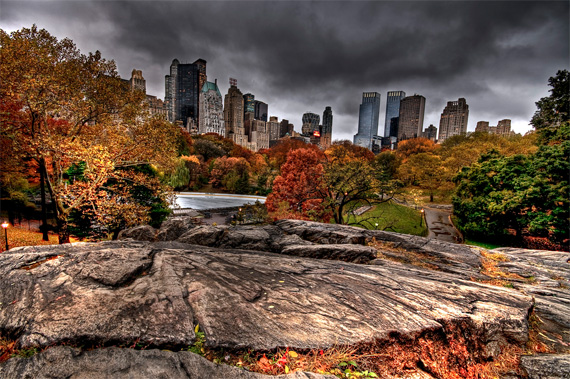
Image source: picturecorrect.com
Another technique for composition is to find contrasting colors. A lone parked red bike with dozens of trees with dark green foliage behind it is an example of great color contrast. In winter, black and white photography looks great on nature as dark subjects interrupt the white in the vastness of snow.

Image source: loadedlandscapes.com
The key technique is to select only a few subjects that give an interesting story, instead of shooting at the wealth of things that can be photographed at the park and end up having repetitive and ordinary pictures anyone else could take.
Hi, I'm Keith W. Springer from New York. Although I've retired as an event photographer, I've never given up my passion and I continue to develop my craft in the outdoors. Connect with me on Facebook here.

